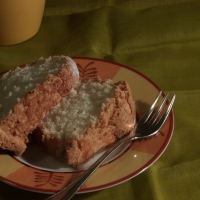
Focaccia pugliese rivisitata da una milanese……

22 Lug

IMG_0160

Il mio lievito madre, pongy, è impazzito: forse il caldo influisce anche sulla temperatura interna del frigorifero? Probabilmente si, ma a dire il vero qui in campagna, dove ho la fortuna di essere, in cucina ho mediamente 22 gradi……insomma non so perchè, ma è talmente attivo che se ne è uscito dal barattolo chiuso ermeticamente…….è felice insomma e se ne va un po’ a zonzo!

Ho deciso di preparare la focaccia pugliese perchè mi stavo organizzando per un barbecue con amici e mi sembrava perfetta insieme alla grigliata di pesce e alle melanzane alla parmigiana. Non ho resistito, però, ad effettuare qualche modifica negli ingredienti……quindi non è proprio una vera focaccia pugliese, ma ve la consiglio vivamente, è buonissima e molto facie.

Ingredienti per una focaccia per 6-8 persone

  • 150 gr di lievito naturale o 15 g di lievito di birra
  • 350 gr di semola rimacinata
  • 150 g di manitoba
  • 350 gr di acqua o un pochino di più se la manitoba la richiede
  • 1 cucchiaino di zucchero
  • 13 gr di sale
  • 25 gr di olio extra vergine di oliva
  • q.b. di pomodorini secchi sott’olio
  • olive snocciolate se volete, io non le ho messe perchè non le avevo……
  • origano q.b.
  1. Rinfrescate il lievito madre e lasciatelo a temperatura ambiente fino a quando non raddoppia (2-3 ore circa).
  2. Sciogliete il lievito madre raddoppiato, o il lievito di birra, in metà dell’acqua leggermente tiepida.
  3. Aggiungete lo zucchero e l’olio: impastate brevemente per farli assorbire.
  4. Aggiungete le farine e  impastate con il gancio se usate la planetaria (o in una ciotola se impastate a mano).
  5. Aggiungete il resto dell’acqua poco alla volta, tenetene un fondo per sciogliervi il sale che sarà l’ultimo  ad essere aggiunto all’impasto.
  6. Lavorate fino ad avere una massa liscia ed elastica.
  7. A questo punto riibaltate la pasta sulla spianatoia dandole una forma a palla (anche se l’impasto è un po’ appiccicoso)
  8. Ora: se state usando lievito madre fare partire la lievitazione a temperatura ambiente e dopo circa un’oretta mettetelo in frigorifero per almeno 8 ore coperto da pellicola e ben oliato..
  9. Se state usando lievito di birra lasciate lievitare a temperatura ambiente fino al raddoppio (circa 3 ore)
  10. Se siete in inverno, la temperatura della cucina potrebbe essere troppo bassa per la lievitazione, per cui vi consiglio di lasciare lievitare nel forno spento con la sola lucina accesa che riscalderà l’aria quanto basta.
  11. Togliete l’impasto con il lievito madre dal frigorifero e portatelo a temperatura ambiente (ci vorrà un’oretta) oppure prendete quello lievitato con il lievito di birra e ribaltatelo in una teglia unta con  abbondante  olio extravergine d’oliva.
  12. Senza schiacciare troppo e usando i polpastrelli cercate di allargare l’impasto senza tirarlo fino a coprire l’intera superficie della teglia.
  13. Lasciate lievitare per almeno altre 2 ore.
  14. Ungere la superfice della focaccia con altro olio.
  15. Preriscaldate il forno a 220° e abbassatelo a 200° appena infornate.
  16. Cuocete fino a coloritura (circa 20 minuti).
  17. A questo punto disponete i pomodorini secchi sulla superficie e aggiungete le olive: salart e cospargete di origano.
  18. Cuocete  gli ultimi 5 minuti  cercando di tenere la porta del forno socchiusa, per fare uscirei  un pò di umidità residua e aumentare la croccantezza della  focaccia.
  19. Una volta sfornata, togliete dalla teglia e servite!!

ENGLISH VERSION

My yeast, pongy,  has got crazy, maybe the heat also affects the internal temperature of the refrigerator? Probably yes, but to tell the truth here in the countryside, where I’m lucky to be, in the kitchen I average 22 degrees …… in short, I do not know why, but it is so active that it came out of the jar tightly closed. In short …… is happy and goes a bit ‘a stroll!

I decided to make this focaccia  because I was planning for a barbecue with friends and it seemed perfect with the grilled fish and eggplant parmigiana.

Ingredients: serves  6-8 people

  • 150 grams of natural yeast or 15 g of chemical yeast
  • 350 grams of semolina
  • 150 g of Manitoba floor
  • 350 grams of water or a little more if the Manitoba requires it
  • 1 teaspoon sugar
  • 13 grams of salt
  • 25 g of extra virgin olive oil
  • q.b. dried tomatoes in oil
  • pitted olives if you want, I do not put them because I had not ……
  • oregano to taste
  1. Refresh the natural yeast and leave at room temperature until doubled (2-3 hours).
  2. Dissolve the yeast doubled, or the chemical yeast in half the water slightly warmed.
  3. Add sugar and oil: mix briefly to absorb them.
  4. Add flour and knead with the hook if you use the food processor (or in a bowl if kneading by hand).
  5. Add the remaining water a little at a time, tap and a fund to dissolve the salt that will be the last to be added to the dough.
  6. Knead until you have a smooth and elastic dough.
  7. At this point put the dough on a work surface giving it a shape of a ball (even if the dough is a bit ‘sticky)
  8. Now, if you’re using natural yeast let it rise at room temperature  about an hour or so then put it in the refrigerator for at least 8 hours, covered with foil and well oiled .
  9. If you are using  chemical yeast let it rise at room temperature until doubled (about 3 hours)
  10. If you are in  winter, the temperature of the kitchen might be too low for leavening, so I suggest you let it rise in the oven with only the small light  on.
  11. Remove the dough with natural yeast from the refrigerator and bring it to room temperature (it will take about an hour) or take the one leavened with chemical yeast and flap in a greased pan.
  12. Without crushing it  too much and using the fingertips try to expand it, without stretching the dough until it covers the entire surface of the pan.
  13. Let it rise for at least another 2 hours.
  14. Coat the surface of the focaccia with some more oil.
  15. Preheat oven to 220 C degrees and before baking,  turn it down to 200 ° C.
  16. Cook until coloring (about 20 minutes).
  17. At this point put the dry tomatoes  on the surface and add the olives: season with salt  and sprinkle with oregano.
  18. Cook the last 5 minutes trying to keep the oven door open, to go out a bit of residual moisture and increase the crispness of the cake.
  19. Once baked, remove from the pan and serve!

Spaghetti fiori di zucca, erba cipollina e peperoncino.

15 Lug

IMG_0140

A volte basta veramente pochissimo per mangiare un gran piatto di pasta!! Il tempo di far bollire l’acqua e buttare gli spaghetti e il sugo, questo sugo, è già pronto!

Avevo trovato dal contadino delle zucchine favolose che ho deciso di grigliare e mettere sott’olio. Alle zucchine erano attaccati i fiori: bellissimi, ancora belli chiusi, quasi profumati! Sapevo però che non sarebbero durati molto con questo caldo..! Ho tolto il pistillo interno, ricordatevi di farlo sempre: è amaro, ho controllato che dentro fossero puliti e non li ho nemmeno lavati, solo passati con uno straccetto umido.

A questo punto li ho tagliati fini fini e buttati in padella. Non avevo voglia di pulire il cipollotto semplicemente…..perchè non mi andava che le mani sapessero di cipolla….per cui ho deciso di provare un bel ciuffone di erba cipollina del mio orto aromatico. Davvero un sugo perfetto, velocissimo e sano per accompagnare “due spaghi” estivi!

Ingredienti per 4 persone: tempo di preparazione 10 min. tempo di cottura 10 min.

  • acqua salata q.b.
  • 320 g di spaghetti
  • olio extravergine di oliva q.b.
  • 8 fiori di zucchina tagliati sottili sottili
  • un bel mazzo di erba cipollina tagliata a pezzetti di mezzo cm circa
  • 100 g di pecorino stagionato grattugiato
  • peperoncino q.b.
  • sale q.b. (ma a me non è servito)
  1. In una pentola capiente, portate ad ebollizione l’acqua salata e buttatevi la pasta. Fatela  cuocere per un tempo pari a due minuti meno di quello consigliato sulla confezione.
  2. Nel frattempo, in una padella con poco olio, fate saltare per un minuto o due i fiori di zucca, aggiungete l’erba cipollina e il peperoncino.
  3. Scolate la pasta, ma non del tutto, lasciatela morbida  e unitela alla padella con il sugo e il formaggio.
  4. Fate saltare per 3-4 min. di modo che il formaggio si sciolga e con l’acqua di cotura formi una cremina (un po’ come gli spaghetti cacio e pepe)
  5. Servite subito aggiungendo un filo di olio crudo buono.
  6. Buon appetito!

ENGLISH VERSION:

Sometimes it takes very little to eat a large and wonderful pasta! The time to boil the water and cook  spaghetti and the sauce is ready!

I found some zucchini from the farmer so fabulous that I  decided to grill them. Attached to the zucchini their flowers: beautiful,yet closed, almost fragrant! But I knew that they would not last long in this heat ..! I removed the pistil inside, remember to do it always it is bitter, I checked that inside were clean and I do not even wash them: I just passed with a damp cloth.

At this point I cut them very thinly and sautè them into the pan. I did not want to clean an onion ….. simply because I did not want my hands to smell…. so I decided to try a nice bunch of chives in my vegetable garden. Really a perfect sauce, a fast and healthy way to get two spaghetti in summer!

Serves 4 people: preparation time 10 min. cooking time 10 min.

  • salt water to taste
  • 320 g of spaghetti
  • extra virgin olive oil to taste
  • 8 zucchini flowers thinly sliced ​​
  • a big bunch of chives cut into pieces of about half a centimeter
  • 100 g of grated pecorino cheese
  • chilli to taste
  • salt to taste (but i did not need it)
  1. In a large pot, bring to a boil some salt water . Let spaghetti cook for a time of  two minutes less than recommended on the package.
  2. Meanwhile, in a skillet with a little oil, saute for a minute or two the flowers, add the chives and pepper.
  3. Drain the pasta, but not completely, leave some water and add it to the pan with the sauce and cheese.
  4. Saute for 3-4 min. so that the cheese melts and the water and forms a creamy sauce (a little like spaghetti with cheese and pepper)
  5. Serve immediately adding a little olive oil good.
  6. Enjoy your meal!

Baguette con lievito madre o di birra.

7 Lug

IMG_0123

Mi dicono che a Milano fa molto caldo, io invece sono in campagna e la mia casa di pietra non ha ancora scaldato i muri: risultato ci sono almeno 6 gradi di diferenza tra interno ed esterno, più un’arietta meravigliosa che filtra dalle finestre: una meraviglia. Ecco perchè posso tenere il forno acceso e sbizzarrirmi con il mio lievito madre.

La ricetta, come sempre, è con lievito madre, ormai io panifico solo in questo modo, ma chi volesse utilizzare il lievito di birra potrà farlo facilmente dividendo per 10 il peso del lievito madre e diminuendo i tempi di lievitazione.

Ingredienti per un kilo di baguette circa:

  • 40 gr di lievito madre rinfrescato o 4 gr di lievito di birra
  • 100 gr di acqua
  • 100 gr di farina Manitoba o comunque forte
  • 500 gr di farina tipo 00
  • 300 gr di acqua fredda
  • 10 gr di zucchero
  • 10-12 gr di sale
  1. Mescolate i 100 g di acqua con il lievito facendolo sciogliere bene.
  2. Aggiungete la manitoba, impastate  e lasciate riposare 10-12 ore a temperatura ambiente  (almeno 8 ore se si usa lievito di birra), attenzione però, se fa molto caldo basta meno.
  3. Trascorse le ore indicate, in un altro recipiente mescolate grossolanamente la farina  00 aggiungendo gradatamente  i 300 g di acqua freddda fino a completo assorbimento otttenendo un impasto grossolano.
  4. Lasciatelo riposare per 20- 30 minuti a temperatura ambiente.
  5. a questo punto potete unire i due impasti tra loro, aggiungete zucchero subito e sale quasi alla fine, continuando ad impastare fino a quando non avete un risultato liscio.
  6. Lasciate riposare ancora un paio d’ ore, poi ripiegate l’impasto in tre parti e ripetete la piegatura un paio di volte.
  7. Dopo circa 5 ore, meno in estate e meno se avete usato ldb, tagliate l’impasto in 5 parti  e lasciate riposare 30 minuti.
  8. Date la forma di baguette, mettete a riposare su un canovaccio ben  infarinato e piegato a ventaglio, con la chiusura dell’impasto rivolta verso l’alto.In questo modo le baguettes non si incolleranno tra loro.
  9. Lasciate lievitare le baguettes coperte fino al raddoppio ( circa 1 – 2 ore).
  10. Capovolgete l’impasto sulla placca da forno, fate i tagli diagonali con una lametta e infornate a 240-250°C , già caldo. statico, ma con un pentolino con acqua per generare umidità. 
  11. Cuocete per circa 25-30 minuti abbassando la temperatura a 200°C a metà cottura e aprendo uno spiffero, gli ultimi 5 minuti.
  12. Mettete a raffreddare su una gratella di metallo o in piedi contro il muro, fino a che saranno ben fredde.

ENGLISH VERSION:

They tell me that in Milan is very hot, but I am in the country and my stone house has not yet warmed the walls: as result there are at least 6 C degrees of difference between inside and outside, plus a wonderful air through the windows: marvellous!!

That’s why I keep the oven on and play around with my sourdough starter.
The recipe, as always, is with natural yeast, now I use only it, but those wishing to use the chemical yeast
can do it easily adjusting  the grams .

Ingredients for a kilo of baguette :

  •     40 grams of yeast refreshed or 4 g of chemical yeast
  •     100 grams of water
  •     100 grams of flour Manitoba or  strong flour
  •     500 grams of flour type 00
  •     300 grams of cold water
  •     6 grams of sugar
  •     10-12 grams of salt


  1.     Mix 100 g of water with the yeast causing him to dissolve well.
  2.     Add the Manitoba and let stand 10-12 hours at room temperature (at least 8 hours if using chemical yeast), after kneading carefully.
  3.    Spent the hours indicated, in another bowl mix the 00 flour roughly,  gradually adding 300 g of water until completely absorbed  getting a coarse clay.
  4.     Let stand for 20 – 30 minutes at room temperature.
  5.     At this point you can combine the two mixtures together, add sugar and salt now almost at the end and continue to knead until you have a smooth result.
  6.     Let stand a couple of ‘hours, then fold the dough into three parts and repeat the folding a couple of times.
  7.     After about 5 hours, less in the summer or if you have used chemical yeast, cut the dough into 5 parts and let stand 30 minutes.
  8.     Given the form of baguette, put to rest on a well-floured cloth and fan folded, with the closure of the dough facing upward. In this way the baguettes not be glued between them.
  9.     Let rise until doubled baguettes (about 1-2 hours).
  10.     Turn out the dough on a baking sheet, you make diagonal cuts with a razor blade and bake at 240-250 ° C, warm. static, but with a pan with water to generate moisture.
  11.     Cook for about 25-30 minutes by lowering the temperature to 200 ° C at the halfway point and opening a draft, the last 5 minutes.
  12.     Place on a wire rack to cool metal or standing against the wall, until they are cold.

Pasta con calamari, peperoni e zucchine!

1 Lug

IMG_0103

Che bello, d’estate si possono cucinare piatti unici e si è a posto! Effettivamente si tende a mangiare meno con il caldo e allora approfittiamo di questo piatto di pesce molto gustoso, colorato e accattivante!! Noi l’abbiamo gradito molto, ma attenzione: i calamari devono essere freschi, in assoluto sono l’ingrediente che fa la differenza nel piatto anche se, devo ammettere, le verdure comprate dal contadino in campagna non hanno affatto sfigurato!

E’ un’estate “strana”, venerdì scorso in campagna abbiamo dormito con la copertina…ed io ero felicissima perchè, ahimè, devo ammetttere che l’estate non è la mia stagione preferita. Certo, per la cucina è una manna: materie prime stupende, varie e fresche, solo che qualche volta il caldo fa passare la voglia di stare ai fornelli o di accendere il forno….o no??! Forse no, i prossimi post vi dimostreranno il contrario!!

Per 4 persone, preparazione 30 min. cottura 10 min.

  • Acqua q.b. per cuocere la pasta
  • olio q.b.
  • 1 cipolla piccola pelata e tagliata finissima
  • 2 zucchine medie, lavate e tagliate a fiammiferoni
  • 2 peperoni, lavati puliti internamente e tagliati nella stessa maniera (uno giallo e uno rosso renderanno il piatto più bello)
  • 500 g di calamari puliti
  • mezzo bicchiere di vino bianco buono
  • 250 g circa di spaghetti di buona qualità
  1. Riempite una pentola con acqua salata e portatela all’ebollizione.
  2. Nel frattempo, in un poco di olio soffriggete la cipolla appena appena, senza esagerare.
  3. Fatevi saltare le verdure per pochi minuti, salate e aggiungete i calamaretti.
  4. Saltate ancora qualche minuto e sfumate con il vino bianco.
  5. Controllate di sale e aggiungetene se necessario.
  6. Scolate al dente la pasta, saltatela con il sugo per un paio di minuti e servite.
  7. Buon Appetito!!!

ENGLISH VERSION:

How nice, in summer you can cook wonderful dishes and you are set! Indeed, we tend to eat less in hot weather so enjoy this fish dish very tasty, colorful and eye-catching! We really liked it, but beware: the squid must be fresh, absolutely: they  are the ingredient that makes the difference in the pot though, I must admit, vegetables bought from the farmer in the countryside have  made the difference too!!

It s a strange summer:  in the country last Friday we slept with the blanket and I was happy because, I must say that summer is not my favorite season. Of course, cooking is wonderful: everything’s raw, beautiful, varied and fresh, it’s only that sometimes we don’t feel like  to stand at the stove or turn on the oven …. or not?! Maybe not, the next post will demonstrate the opposite!

Serving 4 people, preparation 30 min. cooking 10 min.

  • Water enough to cook pasta
  • Extra virgin olive to taste
  • 1 small onion, peeled and finely chopped
  • 2 medium zucchini, washed and cut into fsmall pieces
  • 2 bell peppers, washed, cleaned and cut in the same way (one yellow and one red make the dish more beautiful)
  • 500 g cleaned squid
  • Half a glass of good white wine
  • Approximately 250 g of spaghetti good quality
  1. Fill a pot with salted water and bring to a boil.
  2. Meanwhile, in a pan with a little oil fry the onion just a little, do not overdo it.
  3. Let’s sautè the vegetables for  few minutes, add salt and then the squid.
  4. Sautè a few more minutes and pour in the white wine.
  5. taste the salt and add if necessary.
  6. Drain the pasta, toss with the sauce for a few minutes and serve.
  7. Buon Appetito!
Sarah Scaparone

Food and wine lover

ravanellocurioso

Chef Anarco Vegan

Cultures.Group

Koji•Ferments•Preservation•Cultures•Science

Siciliani creativi in cucina

Ricette di cucina e viaggi

Cooking Loving Sharing

dentro e fuori la cucina

Con Un Poco Di Zucchero

Food Blog since 2008

Maria Cristina's Kitchen

Il gusto della buona cucina

ci vuole passione

ViaggiandoMangiando

ci vuole passione

feel free, naturalmente, gluten free

Il buon cibo è anche gluten free

la gelida anolina

ci vuole passione

ci vuole passione

Ecocucina

Laboratorio di ricette per una cucina a costo e impatto (quasi) zero

Associazione La Trottola

... La Bottega delle Cose di Casa d'Altri

Con le mani in pasta

Diario culinario di una mamma metà cuoca, metà contadina

Anice e Cannella

ci vuole passione